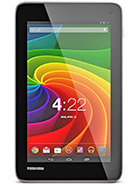
Screenshot in Toshiba Excite 7c AT7-B8
Toshiba Excite 7c AT7-B8

How to take screenshot or screen capture in a Excite 7c AT7-B8
An essential feature of modern mobile phones and tablets is the ability to take screenshots, or capture an image of what is currently displayed on the screen of your Toshiba Excite 7c AT7-B8.
While there are apps that can perform this function, you don't need to install any additional apps as it is already included in the Android 4.2.2 (Jelly Bean) operating system.
When you take a screenshot, you can save a WhatsApp conversation, Tinder message, Instagram story, Facebook photo, or video frame in the memory of your Toshiba device.
On the contrary, if you want to record a video of what is shown on the screen of your Toshiba Excite 7c AT7-B8, for example to record a video call, a story or a web page or piece of an internet video, you can follow the next tutorial: Record screen from Toshiba Excite 7c AT7-B8
Table of Contents:
- First method
- Screenshot without using the buttons on Excite 7c AT7-B8
- How to capture a full page in Toshiba Excite 7c AT7-B8?
- Video instructions
- User questions and answers
First method:
If you want to make a screenshot to your Toshiba Excite 7c AT7-B8 you have to follow these simple steps:
Estimated time: 2 minutes.
1- First step:
First, go to the screen that you want to capture a screenshot of on your Toshiba Excite 7c AT7-B8, whether it's a web page, chat, or application.

2- Second step:
Simultaneously press the power button of your Toshiba smartphone and the volume button below. If you want to capture a video the procedure is the same but pressing the power button and the volume up button.

3- Third step:
The captured image is automatically saved in the gallery of your mobile/cell phone Toshiba Excite 7c AT7-B8.
You can find the image gallery on the home screen, it should have a photo icon, an instant photo or depending on the version of the software installed, your image gallery application may be Google Photos, in which case look for the icon of a four-pointed star made of paper with four colors, one for each point.

4- Fourth step:
Open the image gallery, the images and photos will appear sorted by date, click on the capture that you just made on your Excite 7c AT7-B8, and you will be able to edit it, trim it or send it to your contacts or through your preferred social network.


